 Camfident
How to Record Yourself on Your Phone and Look Great
Burhan Çelebi · Updated 2026-11-14 · 7 min read
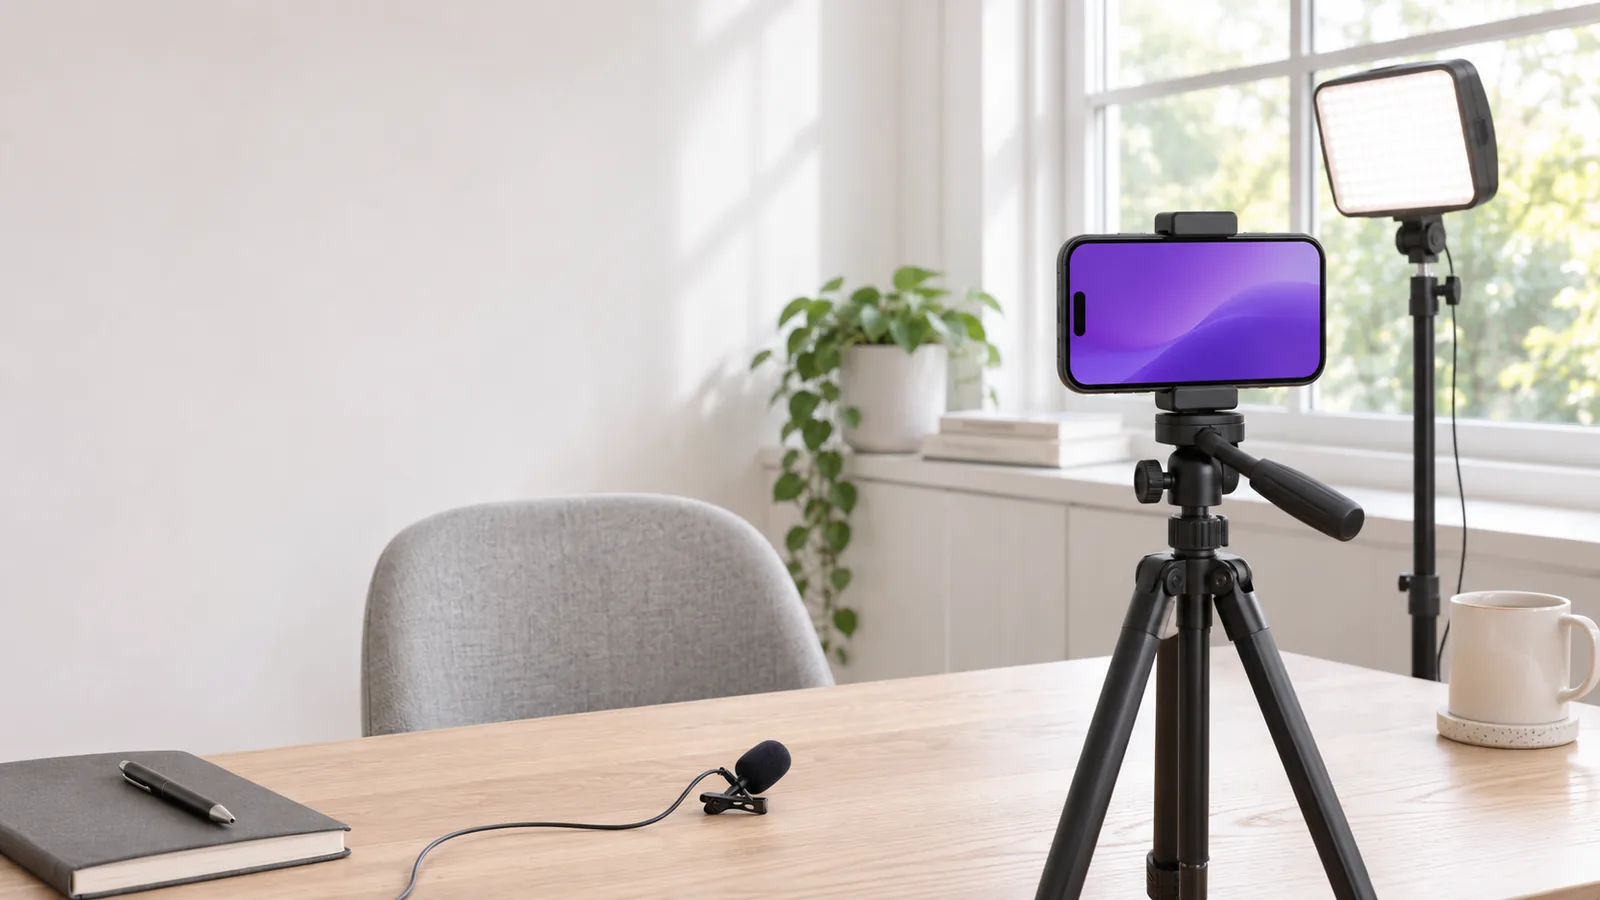
To record yourself on your phone and make it look great, face a window for soft, natural lighting, position the camera lens at or slightly above eye level, and record in a quiet, furnished room with minimal echo. By stabilizing your phone on a solid surface and keeping the lens clean, you produce crisp, professional-quality video on zero budget.
You do not need a multi-thousand-dollar cinema camera or an acoustically treated studio to create engaging video. Modern smartphones—especially iPhones with 4K recording capabilities—pack more optical processing power than the television cameras used twenty years ago. The secret to professional-looking smartphone video is not expensive hardware; it is understanding how to control light, sound, and framing.
Once your physical environment is dialed in, you can focus on building speaking comfort. If you still feel nervous when the red recording light turns on, our comprehensive guide on how to get over your fear of being on camera will walk you through progressive exposure exercises.
The 6-step smartphone recording checklist
Follow these six foundational steps every time you set up your phone to record a talking-head video.
- Wipe your camera lens with a microfiber cloth: Phone lenses collect fingerprints, pocket lint, and facial oils throughout the day. A smudged lens creates a hazy, milky fog across your footage and causes ugly light flares. A quick five-second wipe restores razor-sharp contrast immediately.
- Face your primary light source directly: Never sit with a window or bright light directly behind you, as this will turn you into a dark silhouette. Instead, position your phone directly in front of a window or soft lamp, and face the light so it illuminates your face evenly.
- Elevate the lens to eye level: Looking down into a phone resting on a table creates an unflattering double-chin angle and feels condescending to viewers. Prop your phone on books, a shelf, or a tripod so the lens aligns with your eyebrow level, angled slightly downward.
- Test your room acoustics before recording: Viewers will forgive slightly soft video far more readily than muddy, echoey sound. Avoid empty rooms with bare tile or hardwood floors, which create hollow bathroom echoes. Record in a room with rugs, curtains, couches, or bookshelves to absorb sound reflections.
- Lock your exposure and focus: Tap and hold your face on your phone screen until you see the "AE/AF Lock" indicator. Smartphone cameras automatically adjust brightness when you shift positions; locking exposure prevents distracting flickering and brightness jumps mid-sentence.
- Turn on 'Do Not Disturb' or Airplane Mode: Nothing ruins a great 60-second video take faster than an incoming phone call, alarm, or banner notification vibrating the phone mid-speech.
Where should you place your lighting?
Proper lighting separates amateur phone clips from polished videos. The best free light source is a large window during daylight hours.
Avoid harsh, direct midday sunlight beaming straight onto your face, which creates squinting and dark eye shadows. Instead, choose a window with indirect daylight, or hang a sheer white curtain to diffuse the light into a soft, flattering glow.
`` [ Soft Window Light ] | v [ Your Smartphone ] | v [ You ] ``
If you record at night or in a windowless room, position a soft desk lamp directly behind and slightly above your phone. Adding a warm background lamp behind you creates separation between your shoulders and the wall, giving your shot professional depth.
How to get clear audio without an external microphone
You do not need to purchase a wireless lavalier microphone immediately to achieve crisp, broadcast-worthy sound. Built-in smartphone microphones are surprisingly sensitive if you understand their physical limitations.
To capture clean audio using only your phone:
- Stay within 2 to 3 feet of the device: Audio quality degrades rapidly with distance according to the inverse-square law. Keep the phone close enough that your direct voice is substantially louder than room reflections.
- Dampen room reverb with soft materials: If your room sounds echoey, place a throw pillow or folded fleece blanket on the desk just beneath the phone, out of frame. This traps immediate desktop sound bounces before they reach the microphone.
- Turn off background appliances: Switch off air conditioning, space heaters, ceiling fans, and humming computer towers before hitting record.
Once your recording is captured, presenting your spoken message clearly across modern social feeds often means adding readable text overlays. To explore caption formatting and reach audiences who watch on mute, read our guide on adding captions to talking videos.
What framing works best for vertical video?
When shooting vertical video (9:16 aspect ratio) for Instagram Reels, TikTok, or YouTube Shorts, framing determines how long people pause their scrolling.
Keep these vertical composition rules in mind:
- The rule of thirds: Position your eyes along the imaginary top-third horizontal line of the screen.
- Leave comfortable headroom: Leave about two to three inches of space between the top of your head and the top of the video frame. Too much headroom makes you look small and distant; too little cuts off your forehead.
- Respect safe zones: Social media apps place buttons, captions, and profile icons along the right edge and bottom third of the screen. Keep your face and key visual points centered in the middle third so interface icons do not cover your mouth.
To learn how to plan short-form video runtimes and pacing that hold audience attention, check out our analysis on ideal talking video length for Reels and TikTok.
Equipment roadmap: Free vs. Under $30 vs. Long-term
You do not need to buy everything at once. Use this progressive gear roadmap to invest wisely as your video practice grows.
| Budget Level | Recommended Setup | What It Accomplishes |
|---|---|---|
| Free ($0) | Smartphone + natural window light + stack of books on a desk | Clean daylight illumination, stable framing, zero expense. |
| Under $30 | Basic smartphone tripod ($15) + wired lavalier mic ($12) | Perfect lens height anywhere, consistent vocal clarity without room echo. |
| Later Upgrade | Compact LED panel light ($45) + wireless mic set ($70) | Consistent recording at night or in dark rooms, unrestricted physical movement. |
If you are using an iPhone, Camfident streamlines the technical workflow directly on your device. Its auto-edit tools, part of Camfident Pro, can automatically trim dead silences, generate animated captions, and export in vertical, square, or landscape formats without needing desktop editing software.
Front camera vs. rear camera: which should you use?
Most creators debate whether to use the front selfie camera or the rear lenses. For solo recording, the front camera is usually the best choice because seeing your framing in real time prevents you from recording an entire video with your head cut off.
The rear camera offers slightly richer colors and superior low-light performance. However, unless you have an external monitor, Apple Watch preview, or mirror behind the phone, the risk of bad framing or missed focus outweighs the optical benefit for everyday talking videos.
Frequently Asked Questions
Can I record talking videos while holding my phone in my hand?
While handheld vlogging works for travel clips, holding your phone by hand for talking videos introduces distracting shakiness and tires your arm. Resting the phone against a solid object or mounting it on a cheap tripod immediately elevates production value.
What resolution and frame rate should I select in phone settings?
For crisp online video, set your phone camera to 1080p at 30 frames per second (fps) or 4K at 24/30 fps. Avoid 60 fps for standard talking videos, as it can give dialogue a hyper-real, soap-opera appearance rather than a natural cinematic look.
How do I stop my phone from overheating while recording?
Prolonged 4K recording in warm rooms can heat up your device. Remove your phone case before long sessions, lower your screen brightness, and take short breaks between takes.
What should I wear when recording talking videos?
Choose solid, muted colors like navy, olive, dark grey, or burgundy. Avoid intricate houndstooth patterns or tight stripes, which cause a dizzying optical distortion known as the moiré effect on camera sensors.
Setting up a great recording space does not require high technical expertise or big budgets. Find a window, wipe your lens, prop your phone at eye level, and let your natural voice take center stage.
Related articles
Sources
- Apple Inc. (n.d.). Use iPhone camera tools to set up your shot. iPhone User Guide. Apple Support
- Apple Inc. (n.d.). Record a video with your iPhone camera. iPhone User Guide. Apple Support